|
by
kirupa | 25 November 2009
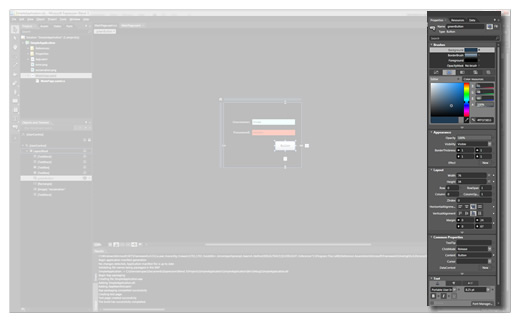
The Expression Blend Properties Inspector is
something you become introduced to very quickly. It
is the giant panel usually on the right-hand side of
the Blend interface that you use to view and set
values on properties:
[ I, for one, welcome our new Properties Inspector
overlord ]
The Properties Inspector is fairly intelligent.
It exposes any properties your selected item or
items exhibit, and for each property, it uses a
value picker appropriate for the type of property it
is dealing with. If you took a snapshot of any
particular area of the Properties Inspector, you'll
see a variety of value pickers in play:
[ the right value picker for the right property is
my motto ]
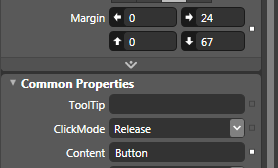
From the above screenshot, the Margin property
has a value picker made up of four number editors,
the Tooltip and Button properties are nothing more
than simple text fields, and the ClickMode property
is a combobox containing values that you can select
from.
Depending on the type of the property, Blend will
automatically choose to use the best value picker
for the job. The reason is that Blend has hardcoded
a lot of the metadata associated with what value
picker to display for which particular type. This
means you get the right value picker almost for free
almost all the time. That's almost awesome.
The number of times I
mentioned the word "almost" in the previous
paragraph should give you pause. While a property of
type enum will
always display a combobox, a property of type
bool will always
display a checkbox, a property of type
string will always
display a textfield, etc., there are times where you
want to override the default value picker with
something more elaborate.
For example, the name of an element is nothing
more than a string. By default, a property of type
string will just get a textfield in Blend's
Properties Inspector. While that allows you to
squeak by with minimum functionality, wouldn't it be
nicer if when you wanted the element name, we
provide a visual picker (pick whip) that you can use
to visually select the element you are interested
in? Or when it comes to working with Storyboards, wouldn't it be nice if you could just pick from a
list of Storyboards you already have instead of
manually typing the name in. In a similar vein as
Storyboards, wouldn't it be great to get a list of
all States that you currently have access to without
typing it in manually?
If you answered Yes to any of the preceding
questions, then you are in luck. With the Behaviors
feature introduced in Blend 3, several of our
behaviors contain properties that use some custom
State, Element, and Storyboard value pickers to
return a string value. Fortunately, these value
pickers were made extensible and usable outside of
the world of behaviors! Using these pickers is sort
of straightforward, so
let's look at how you would use them.
First, you need some properties that you can use
these pickers with. In your code,
you probably have some properties declared, and they
may look as follows:
- public
string
MyState
- {
- get;
- set;
- }
-
- public
string
MyElementName
- {
- get;
- set;
- }
-
- public
string
MyStoryboard
- {
- get;
- set;
- }
Note
For
the sake of brevity I am using simple properties,
but everything you are learning will work with
dependency properties as well.
If you look at these properties in the Properties
Inspector, things will look as follows:
[ for string properties, you get a very simple
textfield as your value picker ]
Because these properties are all of type string,
the Properties Inspector displays a simple textfield
where you can type in your string values. What we
want to do is overwrite the default behavior by
having the MyElementName property display the
Element Name value picker, the MyState property
display the State Name picker, and the MyStoryboard
property display the Storyboard Name picker.
To do this, you will need to add a reference
to an assembly that contains what we need to know
about these pickers. Look in your Projects panel and
expand the References folder. Look and see if you
see System.Windows.Interactivity.dll
displayed. If you do not see it, right click on the
References folder and select Add Reference:
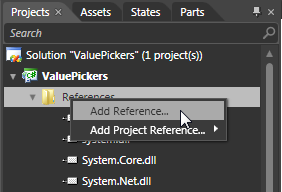
[ add a reference to the missing assembly ]
Once you have done that, the Add Reference dialog
will appear. Navigate to either
{Program Files}Microsoft
SDKs\Expression\Blend
3\Interactivity\Libraries\Silverlight for
Silverlight or {Program
Files}\Microsoft SDKs\Expression\Blend
3\Interactivity\Libraries\WPF\ for WPF and
select System.Windows.Interactivity.dll. Click on
Open to add this reference and to close the dialog.
Your references folder will now contain a
reference to the System.Windows.Interactivity.dll
you just added:
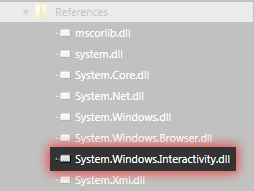
[ your newly added reference will appear now ]
Now that you have added this reference, go back
to the code file where you have your properties
defined. At the top where the using statements have
been defined, go ahead and add the following:
- using
System.Windows.Interactivity;
Once you have done this, all you have to do is
specify which picker you want for each property.
This is handled by an attirbute you define on the
property itself. The attribute is called
CustomPropertyValueEditorAttribute, and it
takes an enum from
CustomPropertyValueEditor as its argument.
The CustomPropertyValueEditor enum contains the
following values: Element,
StateName,
Storyboard.
Combining all of this, let's look at what our
above properties will now look like when attributed
to use the appropriate value picker:
- [CustomPropertyValueEditorAttribute(CustomPropertyValueEditor.StateName)]
- public
string
MyState
- {
- get;
- set;
- }
-
- [CustomPropertyValueEditorAttribute(CustomPropertyValueEditor.Element)]
- public
string
MyElementName
- {
- get;
- set;
- }
-
- [CustomPropertyValueEditorAttribute(CustomPropertyValueEditor.Storyboard)]
- public
string
MyStoryboard
- {
- get;
- set;
- }
Notice that each type has
the appropriate value from
CustomPropertyValueEditor
chosen. If you build your project (Ctrl + Shift + B
or Project | Build) and take a look at your
Properties Inspector where these three properties
live (in the usercontrol instance more than likely),
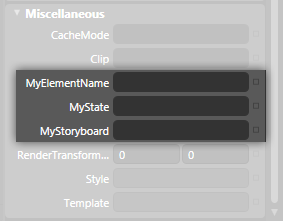
you should see something like this:

[ notice that you now have the custom value pickers
you defined ]
What used to be boring string editors are now the
custom value pickers that allow you to more easily
gain access to an element name, a state name, or a
storyboard name.
Hopefully this fun little article gave you a quick
overview of the Properties Inspector and how you can
override the default value pickers to provide
something more elaborate. While I only discussed the
Element, State, and Storyboard pickers, there are
similar attributes that you can set on properties to
gain more specialized pickers.
In the end, all that is returned by the three
pickers that you used is a string value. You may be
wondering whether it is really worth all of this
additional steps just so you save time from having
to memorize a name from another part of the UI and
type it in manually. The answer to that question
depends entirely on you or who your intended
audience is for this property. With respect to the
element, state, and storyboard pickers, while you
only get a string value at the end, there are some
nice benefits you gain indirectly.
If you refer to a state, element, or storyboard
and end up renaming something somewhere down the
line, any referenced object will automatically be
renamed in the Properties Inspector. This magic,
also known as referential integrity, is something
you only have when you set the values using the
custom value pickers. If you think that is cool, we
show a lot more favoritism to the element name value
picker. If you use the pick whip to select an
unnamed element, Blend will name the element for you
automatically. Pretty cool, ehh?
If you would like to see a working version of my
example, feel free to download the source files
below:
Once you have opened your project, select the
blue rectangle usercontrol and look in the
Miscellaneous category where the MyElementName,
MyState, and MyStoryboard properties have been
defined.
Just a final word before we wrap up. What you've seen here is freshly baked content without added preservatives, artificial intelligence, ads, and algorithm-driven doodads. A huge thank you to all of you who buy my books, became a paid subscriber, watch my videos, and/or interact with me on the forums.
Your support keeps this site going! 😇

|


