|
by
kirupa |
15 January 2009
In Silverlight and WPF, you have a lot of choices
in how to lay out your content. This is accomplished
via layout panels whose only purpose is to help
arrange all of the content that you decide to place
inside them. While most panels are pretty boring, in this article, we will look at two
panels who are anything but! These panels are known as WrapPanel and StackPanel.
As their name implies,
WrapPanels wrap any content stored within its
boundaries, and StackPanels stack content. That
seems pretty simple, but just to highlight
what makes them useful, let’s look at quick examples
of both layout controls in action.
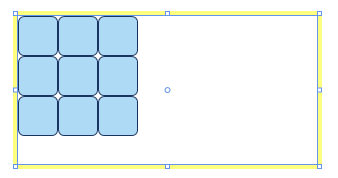
A WrapPanel allows you to place content inside it,
and it wraps the content over new rows and columns
if there isn’t enough space available. The following
screenshot shows you some square shapes placed
inside a WrapPanel whose orientation is Horizontal
where rows are filled first:

[ when horizontally oriented, the contents fills out
horizontally first ]
The WrapPanel ensures that no elements stored
inside it go beyond the panel’s boundaries. That is
why you see some of our squares starting on a second
line instead of extending the first line of squares
indefinitely.
You can also set the orientation to be Vertical,
and our WrapPanel fills columns first:
[ when vertically oriented, the content fills out
vertically starting at the top-left ]
The StackPanel is similar to WrapPanel, but a major
difference is that it doesn’t wrap the content.
Instead, it allows you to stack contents
either horizontally or vertically. The following
image shows you some green squares placed inside a
StackPanel whose orientation is Horizontal:
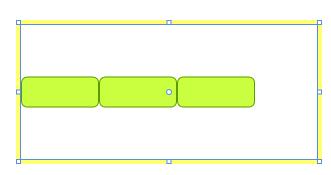
[ contents stacked horizontally ]
Likewise, if we change our above StackPanel to
have a Vertical orientation, our green squares are
stacked as shown in the following image:
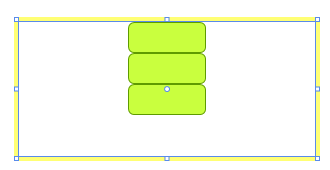
[ contents stacked vertically ]
These panels are great because they take care of
the positioning of the individual content inside
them automatically. You add your content, and
poof, everything works.
Now that you have an
introduction to how they work, let's get to the fun part
where you actually get to use them. Launch
Expression Blend, and create a new application. I am
going to create a WPF application, but you can
create a Silverlight application if you want. Just
note that the WrapPanel is something that you get in
Silverlight 2 only if you have the
Silverlight Toolkit installed.
Once you have launched Blend, open your Layout
panels menu by clicking on the icon in your toolbox
that looks like it may contain panels:
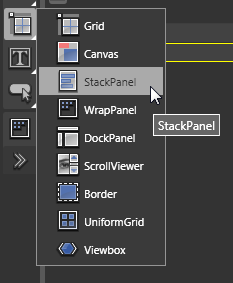
[ once you find it, the layout panel flyout menu is
all you need! ]
From this menu, you can view all of the layout
panels that you can use - including your friendly
StackPanel and WrapPanel. Using a panel takes two
steps. First, you have to select it from this menu.
Once you have done that, your layout panel icon in
the toolbox will change to display the icon of the
panel you just selected:
[ notice that your layout panel icon in the toolbox
has changed ]
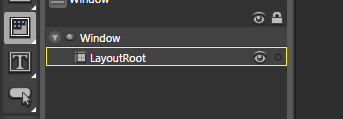
After the icon displays, double-click on the icon
to insert the panel into your application. Because
what you are inserting is just a panel, what you see
will just be an entry in your object tree and an
outline on the Artboard indicating that a panel has
been inserted:
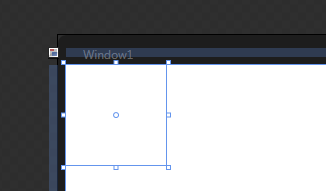
[ your panel inserted on your artboard ]
With your panel inserted, you can reposition and
resize it just like you would another other control
that you place on your Artboard. The difference is
that you can easily place contents inside them. I
just inserted a WrapPanel, and notice what happens
when I place a lot of buttons into it:
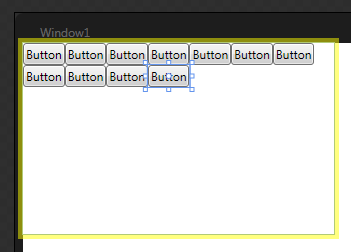
[ a flock of buttons placed inserted into a
WrapPanel ]
To customize your panel, you would just the
Properties Inspector that appears on the right-hand
side. The one property that you would probably be
most interested in is the one that changes the
orientation of how content inside your WrapPanel or
StackPanel is placed. That property is aptly
called...Orientation:
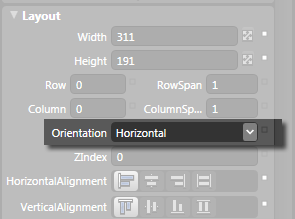
[ the Orientation property allows you to pick how
your items will be arranged ]
Changing the value of what is displayed by using
the combobox will allow you to easily jump between
the Horizontal and Vertical orientations.
That
is all there is to it when it comes to the WrapPanel
and StackPanel. When it comes to building
applications, a control that allows you to arrange
contents inside them is quite valuable.
Just a final word before we wrap up. What you've seen here is freshly baked content without added preservatives, artificial intelligence, ads, and algorithm-driven doodads. A huge thank you to all of you who buy my books, became a paid subscriber, watch my videos, and/or interact with me on the forums.
Your support keeps this site going! 😇

|


