by
spiro mifsud | 16 February 2006Lately,
I've read that people have been trying to figure out how to achieve one of the
latest fads in image transitions, the "zoom motion-blur" transition. At first,
this transition may appear to be hand-held video footage or perhaps manipulation
of z space coupled with some motion blur done in After Effects.
Fortunately, this effect can be achieved through some clever use of Flash and
very basic ActionScript. In this tutorial, you will learn how to create the
'zoom motion-blur' transition using Photoshop and a single hi-res image:
[ click anywhere on the above image to view the
effect ]
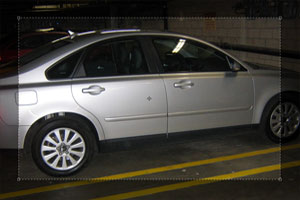
Before you get started, it's best to decide what your subject
will be. The effect works best if you can zero-in on something smaller or some
place you might move towards. In this case, I have car, and I simulate someone
quickly moving towards it.
Let's get started:
-
Obtain a hi-res image and open it in Photoshop. This is
the only image you will need. My image was from my 3.2 megapixel digital
point and shoot measuring 2048 x 1536 px.
Once you have your photo. Perform any touching up as if
you were going to prepare it for web.
Our final Flash movie will be 320 x 200. If you choose to
make your final zoom/transition larger or smaller, please note that you will
have to adjust accordingly.
-
In Photoshop, we will create a series of crops from the
original image at 320 x 200. Please be sure to select the
crop tool in Photoshop and set the crop dimensions to 320 x
200.

Proceed to crop about 8-9 images on the
ORIGINAL image. Carefully moving each crop closer to simulate
the zoom. Don't worry if you are not exact, this is what will create the
shaking effect. Save these images using the 'Save for Web'
option in Photoshop using the .PNG file format using a
sequential naming convention (ie. car1.png, car2.png, etc)
-
After you have created your images, you are ready to apply
the blur effect on each image. To simulate a motion blur, we will use the
Radial Blur, found in the Filter, menu of
Photoshop.
However, before we apply the blur, create copies of the
first and last images and rename them 'first.png' and 'final.png'. These
will serve as the endpoints that are not in motion.
Let's start applying the effect! Open your first car image
(not the copy) and select the Radial Blur. The following
panel should appear:
Be sure to set your Blur Method to Zoom.
Keep the quality set to Good. Save your images again. Repeat for all images
except for 'first.png' and 'final.png'. If you are clever, set a batch save
for this process.
So far, we have been doing all of our work in Photoshop. In
the next page, let's switch gears and work in Flash for a while.
Onwards to the next page!
|


