|
by
kirupa | 7 July 2009
In the
previous page, I described the problem you are
trying to solve and provided some basic instructions
on how to get your project setup. In this page,
let's dive right into tackling the first part of the
problem.
There are a
handful of controls that you can use to display
lists of information. Your ListBox is one such
control. What these
controls share is that they use something known as
an ItemsPanel internally.
As its name implies,
the ItemsPanel is responsible for the layout of any
items they plan on displaying. As you can guess, a
ListBox's ItemsPanel helps display items
horizontally or vertically. What we are going to
do is modify our ListBox's ItemsPanel to have its
items wrapped.
To modify the
ItemsPanel, right click on your ListBox, and from
the menu that appears, go to Edit Additional
Templates | Edit Layout of Items
(ItemsPanel) | Create Empty:
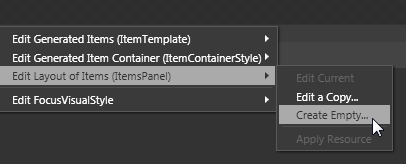
[ edit your ItemsPanel by creating a new one ]
A dialog titled
Create ItemsTemplatePanel Resource
will appear:

[ accept the default values for creating your new
ItemsPanel ]
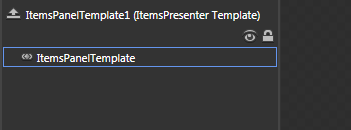
Accept the default
Name value provided for you and just hit OK. Once
you have clicked OK, the dialog will disappear and
now you will be editing the template for your items
panel. The items panel that is used by default for a
ListBox is a StackPanel (or a variant of it), and
you can tell this by looking at the object tree:

[ you can easily see the default panel used in your
ItemsPanel ]
Select your StackPanel
either in the object tree or on the artboard and delete
it by hitting your Delete key. You have just gotten
rid of your items panel - oh the horror!:
[ delete the default StackPanel that is provided for
you ]
Don't worry. This
removal is entirely temporary. The next step is for
you to replace your recently removed StackPanel with
a WrapPanel. There are several ways you can do this.
The easiest way is to display your Assets tab
(Window | Assets) and search for WrapPanel:
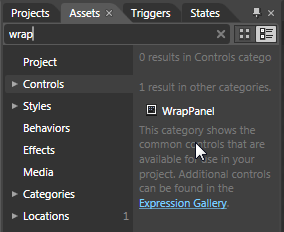
[ do a search for WrapPanel to insert it ]
Note - if you are in a Silverlight
project, you will need the
Silverlight Toolkit installed to be able to use
WrapPanel.
Once you have found
your WrapPanel, just double click on it to insert it.
It will automatically become the panel that is used
as your ItemsPanel. Notice that your object tree now
displays the WrapPanel instead of your StackPanel
that was visible earlier:
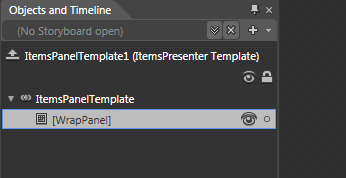
[ let's all welcome the WrapPanel to the ListBox
family ]
Ok, you are now done
modifying the template that represents your
ItemsPanel, so it is time to scope back up. You can
do that by clicking on the Listbox button in your
breadcrumb bar found towards the top of your
artboard:
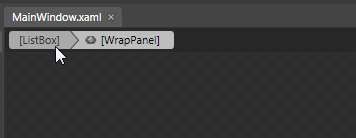
[ let's go back to editing the ListBox as a whole ]
You will now be back
and viewing your listbox as a whole. Notice that your
ListBox's contents look a bit different now:
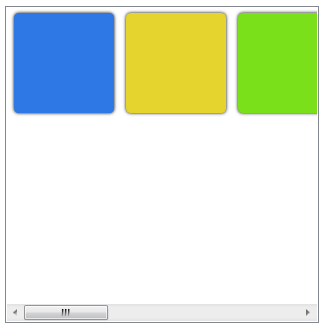
[ your listbox's contents are now stacked
horizontally ]
Instead of your
contents being vertically stacked, they are now
horizontally stacked. This isn't exactly what we
were hoping for when you swapped out your StackPanel
with a WrapPanel. Before you think you've done
something incorrect, you have not. This is expected,
for there is one more thing you need to do.
Onwards to the
next page!
|


