by kirupa | 19 January
2006
In the previous page,
you masked the content so that your users do not see
everything at once. In this page, you will create the
scrollbar and related accessories that will allow you to
scroll through the content easily.
Let's pick up from where we left off:
- Create a new layer and call it scrolltrack.
Ensure that you have selected this layer.
- Draw a tall rectangle without a border. For the fill
color, give it any lightly-colored background. To be
more accurate with the size, let's enter the width,
height, and x/y offsets using the Properties panel.
Select your newly drawn rectangle and enter the
following values into your Properties panel:
- Width: 20
- Height:
160
- X: 280
- Y: 0
Your rectangle should now be placed on the right side
of your movie:
[ your rectangle is
located on the right side of your movie ]
- Select your rectangle again. Press F8
(Modify | Convert to Symbol). The Convert to Symbol
dialog window should appear. Give it the name
scrolltrack, select the option for Movie Clip, and
then press OK:
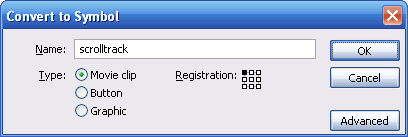
[ convert your
rectangle to movie clip ]
- With your rectangle now a movie clip,
let's give it an instance name. Select the scrolltrack
movie clip (formerly the tall rectangle) and give it the
instance name scrollTrack from the Properties
panel
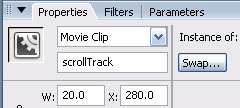
[ give your newly
converted movie clip the instance name scrollTrack ]
- Let's add our scrollFace (the thing you
click and drag) now. Create a new layer, and give it the
name scrollface.
- With your scrollface layer selected, draw a small
rectangle on your stage. Give it a darker fill color
than your scrollTrack rectangle. Select your rectangle,
and in the Properties panel, enter the following values:
- Width: 20
- Height:
40
- X: 280
- Y: 100
Your rectangle should look similar to the following:

[ the rectangle
that will eventually become your scroll face ]
- Let's now turn the square into a
movieclip. Select the square, press F8 or go to Modify |
Convert to Symbol. Give it a name such as scrollface,
select the option for Movie Clip, and press OK.
- Now, select your rectangle (now a movie clip), and
give it the instance name scrollFace:
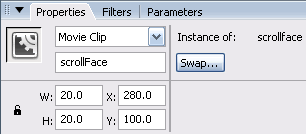
[ give the
scrollface movie clip the instance name scrollFace ]
On the next page, let's add our up and down buttons and
add our code!
Onwards to the next page!
|