by Sam Kellett aka Sammo |
23 December 2005
From the current tutorials you could assume I was just a basic PHP'er. That is
not true. My pride and joy is Flash. Since this is the season for snow, I figure
I will create a snow tutorial that improves modestly upon the existing snow
tutorials on this site.
What makes this tutorial different from the
Snow 2.0
tutorial by Kirupa is that all of the code is specified in one frame itself.
This helps make the code more modular and easier to maintain.
The following is an example of what you will create:
[ an example of falling snow ]
You can see a more realistic example on my site at
Flash
Bang Pop! Let's start:
- Create a new document in Flash. Right click anywhere on your stage and
select Document Properties.
- From the Document Properties window, set your stage's width and height
to 400 by 300 pixels respectively, give your movie a dark background, set
the frame rate to 25, and press the OK button:
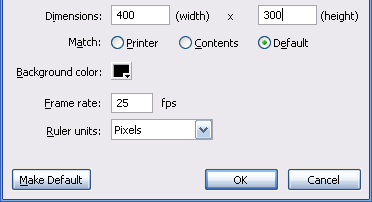
[ the document properties window ]
- Now, go to Insert | New Symbol. The Create New Symbol dialog
window should appear. In the Name field, type the word snow. From
this same window, select the option for Movie Clip and press OK.
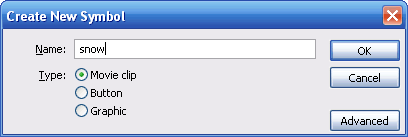
[ the Create New Symbol dialog box ]
- You should now be in the snow movie clip stage and
timeline. Draw a small white ball to symbolize a snowflake. Feel free to
make any modifications to make your snowflake look realistic. Here is how my
snowflake looks (after zooming in a lot):
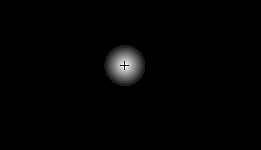
[ how my snowflake looks like (after
zooming-in) ]
- Click on the Scene 1 tab above your timeline to return to exit
the Snow movie clip:
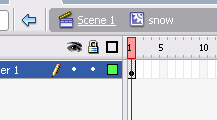
[ click on the Scene 1 link ]
- Press Ctrl + L to display your Library. Right click on your
snow movie clip in the library and select Linkage. Make sure to check
the 'Export for ActionScript' and 'Export in first frame' checkboxes and
press OK:
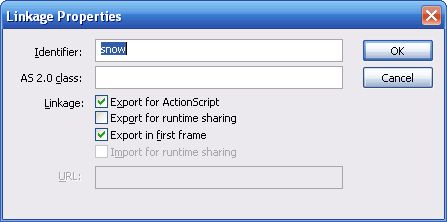
[ the Linkage Properties dialog window
]
- You are almost done with re-creating the snow effect! We just
need to add some code. Right click on Frame 1 and select Actions. Copy and
paste the following lines of code into your Actions window:
- init =
function ()
{
- width =
300;
- // pixels
- height =
200;
- // pixels
- max_snowsize =
10;
- // pixels
- snowflakes =
50;
- // quantity
- for (i=0;
i<snowflakes;
i++)
{
- t =
attachMovie("snow",
"snow"+i,
i);
- t._alpha
= 20+Math.random()*60;
- t._x
= -(width/2)+Math.random()*(1.5*width);
- t._y
= -(height/2)+Math.random()*(1.5*height);
- t._xscale
= t._yscale=50+Math.random()*(max_snowsize*10);
- t.k
= 1+Math.random()*2;
- t.wind
= -1.5+Math.random()*(1.4*3);
- t.onEnterFrame
= mover;
- }
- };
- mover =
function()
{
- this._y
+= this.k;
- this._x
+= this.wind;
- if (this._y>height+10)
{
- this._y
= -20;
- }
- if (this._x>width+20)
{
- this._x
= -(width/2)+Math.random()*(1.5*width);
- this._y
= -20;
- } else
if (this._x<-20)
{
- this._x
= -(width/2)+Math.random()*(1.5*width);
- this._y
= -20;
- }
- }
- init();
- Save your file and preview the animation. You should see some
falling snow.
While you are finished with recreating the falling snow effect, I'm sure you
would like to know how it works so you can customize it for your own animation.
Who knows, you may even create a better falling snow effect!
Onwards to the
next page!
|