|
by
kirupa | 27 July 2007
In the
previous page, you started implementing the custom font
feature for each combobox feature. Let's pick up from where
we left off and finish this feature on this page.
-
With our data template created, let's edit the
StackPanel and TextBlock controls that were created as a result. Right click on your
combobox and, from the menu that appears, go to Edit Other Templates | Edit
Generated Items (ItemTemplate) | Edit Template:
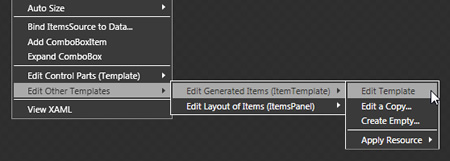
[ edit your Generated Items' Template ]
-
After you have navigated the horde of
menu-items to select the Edit Template item, you'll see your combobox's ItemTemplate
exposed for you to edit:
[ you now have access to the controls that specify the ItemTemplate ]
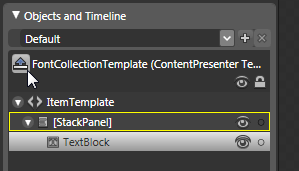
If you glance at your Objects
and Timeline panel, you'll see that the controls you saw in the Create Data
Template window are the only controls that are displayed:
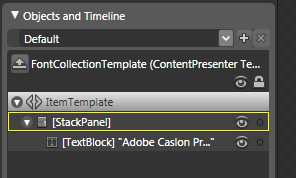
[ the controls you specified in your data template are displayed ]
Getting back to our task at
hand, select your TextBlock with the mouse so that it is highlighted. You can
select the textblock directly from the Artboard or from the Objects and Timeline
panel.
-
With your textblock selected, find the
FontFamily's Advanced Property button under Common Properties just like you
did earlier:
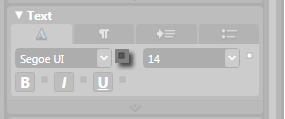
[ click on the font family's Advanced Properties button ]
Click on the Advanced Property
button and select the Data Binding item:
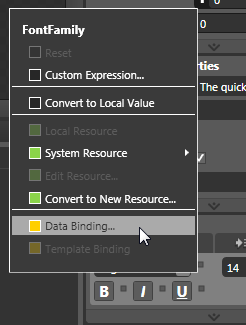
[ select the Data Binding item to access the binding properties for your
FontFamily ]
-
After clicking the Data Binding item, you'll
be back once again to your Create Data Binding window. Click on the Element
Property tab, and from the Scene Elements area, select your textblock:
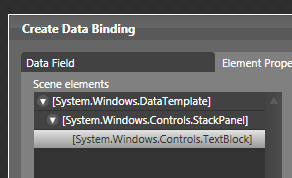
[ select your TextBlock under Scene elements ]
-
On the right half of your Create Data Binding
window, where the Properties area is, select the Text : (String)
property:
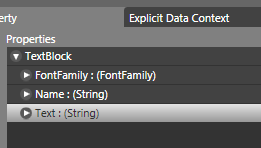
[ under Properties, select the Text property ]
-
After you have selected the Text property,
press the Finish button to accept the binding and to close the Create Data
Binding window. Blend will take a few seconds to process what you did, but
your end result will be that each of your combobox's items - the textblock -
now display in the same font as the text they are displaying:
[ how your combobox's items look like right now ]
-
Even though you are still in this special
ItemTemplate editing mode, that is nothing more than just another way of
saying you want to edit the internals of how your control displays its data.
You are free to make the usual modifications that you normally are capable
of. Let's look at one such modification.
Right now, all of the TextBlocks seem closely
stuck together. Let's increase the spacing by adjusting the padding. With
your textblock selected, search for the Padding property in
your Properties panel:
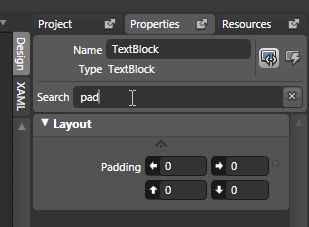
[ typing the letter pad in the Search field returns the Padding
property ]
You should find the Padding
properties after typing in only a few letters in padding. In the Padding fields,
set the left and top padding values to 3:
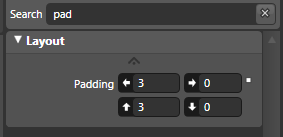
[ set your top and left padding values to 3 ]
Your combobox's textblocks
should now have some extra breathing room!
-
Ok, let's go back and leave this ItemTemplate
editing mode. To return to your main Artboard, press the
Scope Up button in your Objects and Timeline panel:
[ use the Scope Up button to exit the ItemTemplate editing mode ]
-
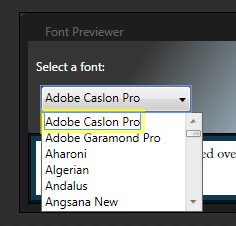
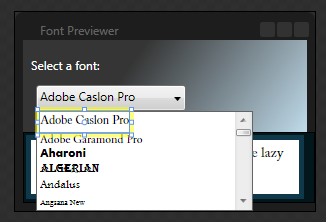
Run your application one more time by pressing
F5. Notice that now, your combobox's items are displayed in the very font
they are displaying:

[ your application is finally complete ]
If you experience a delay when
you click on your combobox, that is a sideffect of displaying lost of complex
visual data in our implementation. Check out my
blog post on this
topic to learn how to fix it.
Phew. This was one long tutorial. In the
next page, you'll learn more details about why you did some of the things you did.
After all, it isn't good enough to memorize the steps I have provided. You
should be able to explain why I used the steps that I did and be able to apply
what you learned in creative ways that go beyond the basic information in this
tutorial.
Onwards to the
next page.
|


