|
by kirupa |
1 March
2007
In the
previous page you got a brief overview of what event
handlers are and how to add them usual a visual editor like
Visual Studio or Expression Blend.
While the visual approach I outlined above will be the
preferred way of binding events to an event handler, you can
just as easily use code to accomplish the same thing. You
may be wondering why you would choose a less visual
approach. One good reason is, if you are dynamically creating a control, the only way to attach events would be through code.
I provide an example of that a few paragraphs down, so you
can see what I mean.
Let's say we have a button called btnOK, and our goal is
to attach an event to it using just code. All you have to
do is pick the appropriate event you wish to use and link it
to a new RoutedEventHandler with the name of your event
handler:
- btnOK.Click
+=
new RoutedEventHandler(ButtonOkClicked);
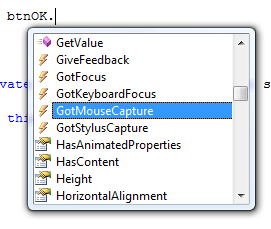
If you use Visual Studio for writing the code, the inline
auto-complete is very handy:

[ auto-complete is quite helpful in times like this ]
Right now you may be wondering how anybody could know to
use RoutedEventHandler without the help of AutoComplete. If
you are just getting started with WPF, it may be difficult
to know that, but just remember that you need to bind an
event to an event handler. Later in this article and in
greater detail in subsequent articles, I will explain these
in more detail.
Like I hinted at in the previous paragraph, one disadvantage with the code approach is that
if you want to use events or event handlers beyond the common ones that you
are familiar with, you will have to spend some extra time
combing through the displayed methods and properties for
your object to find the appropriate event:
[ browsing through methods and properties ]
In the visual approach, all events are grouped
together in one pane, but in the larger scheme of things, it
is just a minor detail that you should be aware of.
Getting the event bound to an event handler is just one
part of what you need to. The second part is to actually
create an event handler. Before I go into greater detail,
let's first look closely at the event hander I show below:
-
private void
ButtonOkClicked(object
sender,
RoutedEventArgs
e)
- {
- this.Close();
- }
Notice that the event hander takes in two
arguments from the event that fired - the sender and the event. Basically, the sender is the control you
clicked on, and the event (e) is the
particular input that triggered the event handler such as a
key press or a mouse click.
If you took the visual approach, the above event handler
would automatically be created for you. If you used the code
approach, you would need to define an event handler
following a similar structure with the two arguments. Let's
look in greater detail at what the two arguments actually do
on the next few pages.
Onwards to the
next page!
|


